There are many ways to finish a quilt, and hand-quilting is one of my favorites. Stitching your quilt together by hand is a slow and time consuming process. But it is also deeply satisfying. Hand quilting gives quilts a lovely soft, crinkly texture. And using a thicker thread for hand quilting means that your stitches are much more visible than standard machine quilting.
If you've never tried quilting by hand before, and you're wondering where to start, this post is for you!
Hand Quilting Supply List
For a more detailed breakdown of how to choose your tools, check out this post.
Marking Your Quilt

Mark your quilt with your tool of choice.
Usually, I will use my quilting ruler and Hera marker to mark even straight lines.
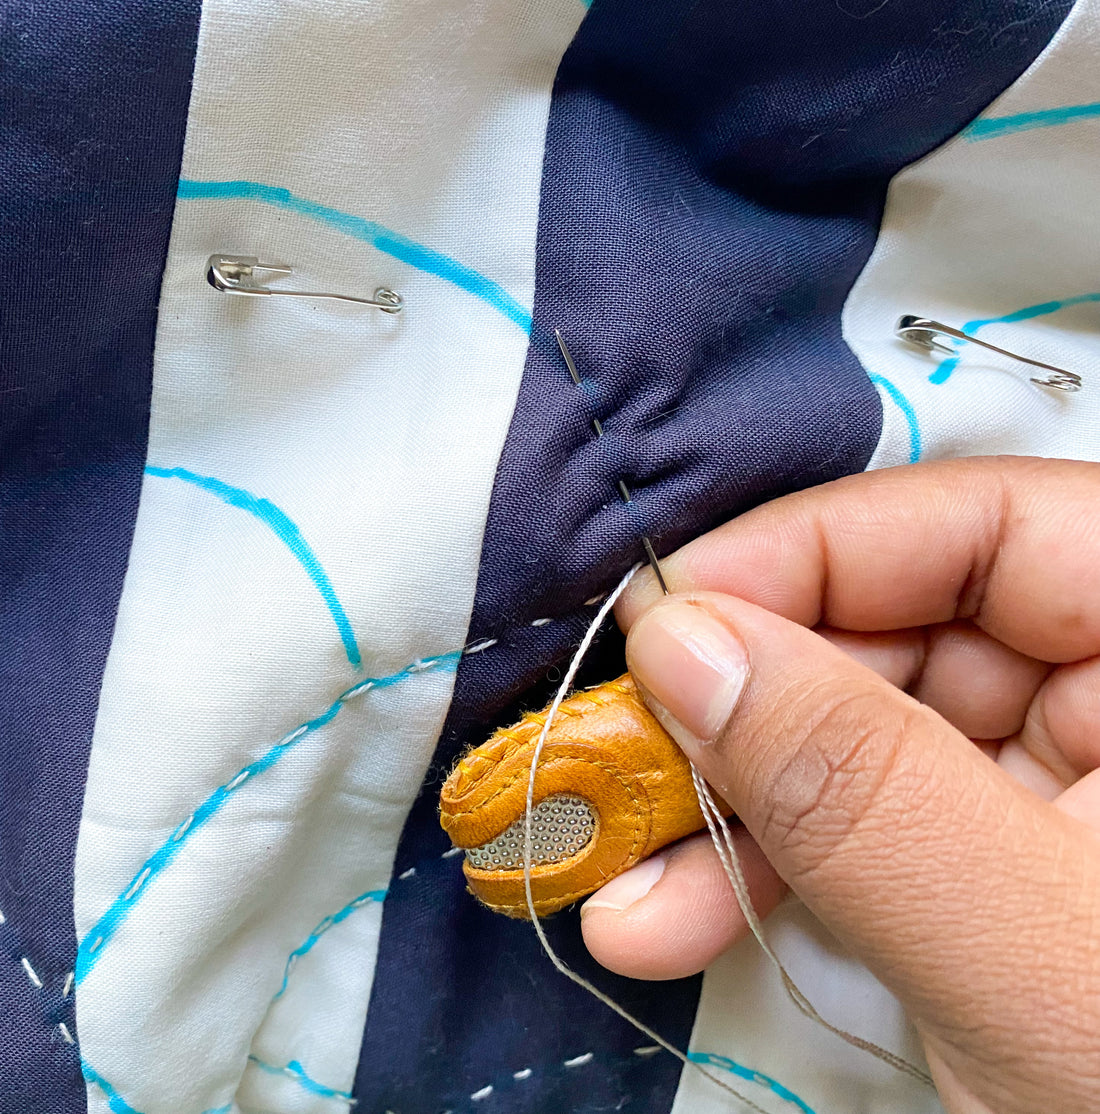
In the picture above, I’m using a blue Dritz washable marker to mark a variation on the Baptist fans quilting pattern. (See my tutorial on how to mark this fan pattern here!)
However you decide to mark your quilt, make sure your lines are clear and visible - you’ll want to follow them as you stitch. You will also want to remove the lines when you're done stitching, so make sure that you're working with something that will easily come out. A hera marker is great for this, but you can also use a washable fabric pen or chalk tailor's pencil. If you choose to use a washable pen or pencil, I highly recommend testing on a scrap of fabric first, to make sure it will wash out when you're done!
Preparing Your Thread

To begin, cut about 2 feet of hand quilting thread off your spool. This should be a length of thread that you’re comfortable working with. Really long pieces can tangle easily and cause hard-to-fix knots in your thread, which is why I personally like to work with a length of about 2 feet (and never more than 3).
Smooth the thread with your fingers several times. This will transfer the oils from your hands, and help keep the thread smooth and knot-free when you stitch.
If you’re using thread gloss, this is a good time to apply it to your thread. Hold the thread tight against the gloss, and pull, coating the thread. Repeat a couple of times.

Thread your needle, then tie your knot on the opposite end of the thread. I do a simple double knot, about 1/4 to 1/2 inch from the thread end.
Stitching
Begin stitching by hiding your knot in the batting layer of your quilt.
If you’re starting to stitch along the edge of your quilt, simply slide the needle between the backing and batting of the quilt, and bring up your first stitch.

If you’re beginning in the middle of your quilt, decide where you would like your first stitch to be. About 1 inch away from where you want that first stitch to start, insert your needle into the quilt’s top and batting layers. Guide your needle to the start of the first stitch, and pull the thread through.


Now, holding the quilt top in one hand and the thread in the other, gently but firmly tug on the thread until the knotted end pulls through your quilt top. It’s important to be firm and slow here. Tugging too hard, or too suddenly, will yank your thread out of your quilt entirely. We just want to pull the knot into the batting layer of your quilt.

Trim away the extra thread if needed, and rub the area with the thread tail until the thread disappears into the quilt batting.

Stitch a running stitch along the line you marked. This is the most basic sewing stitch, and you’re probably familiar with it already. Just weave your needle through all 3 layers— quilt top, batting, and backing.
There are many ways to stitch, and you’ll want to find the way that is most ergonomic for you. Personally, I use my thumb and index finger of my right hand to weave my needle through my quilt. I pick up 4-5 stitches at a time.

Then, I use my middle finger (with a thimble on!) to push the needle through the many layers of fabric. When the needle is nearly all the way through, I’ll grab it with my index finger and thumb again and pull my stitches taught.

Don’t worry about your stitches being perfectly even, especially when you start out. Just do your best to follow your markings. Your stitches will naturally get straighter and more even with time. But in the meanwhile, a little unevenness in stitches can be charming, showing the hand of the quilter in the finished work.
Tying Off & Burying Your Threads

When you're nearing the end of a line of quilting, stop one stitch short of where you want to end. Bring the thread up to the top of the quilt.
Tie a double knot about 1/2 inch from the last stitch.


Then place your last stitch, pushing your needle through the quilt top and into the batting layer, without going all the way through. Bring the needle up an inch or two away, and tug the thread to bury the knot.
Trim your thread as close to the quilt top as possible, and rub that area a bit until the thread tail disappears into the quilt.

Common Hand Quilting Problems & Solutions
A lot of hand quilting is intuition. The more you stitch, the more you’ll realize what it feels like when stitching is going well. Like any hand craft, you’ll feel when things are off, and you’ll get better and better at creating the kinds of stitches you’re envisioning.
That said, there are a few common issues that I’ve run into while hand quilting, and the fixes I found. Hopefully these will save you some troubleshooting!
Thread not pulling through easily. This usually means that your thread is too thick, and I have this issue when I use Size 5 Pearl Cotton. I would use a thinner thread. Or, if you really like the thread you’re using, you may want to try a bigger needle.
Needle not pulling through easily. If the needle isn’t going through easily, and you’re having to push or tug a lot, that could mean your needle is too big. The easiest solution is to use a smaller needle. If your needle is getting stuck right at the eye/ start of the thread, look closely at your needle. What is the eye shaped like? Some needles flatten out at the eye, and I find that makes them harder to use with thick thread. I’ll often switch to a needle that remains round at the eye, and this will solve the problem!
Bearding. This is the name for what happens when little tufts of batting travel along your thread, getting pulled up through your quilt top or backing. If you’re seeing lots of white fluff coming through with your stitches, you’re experiencing bearding. I find that using a smaller needle often solves this problem.
Fingers hurt. If your fingers hurt while hand sewing, use a thimble and use it to push the needle through your fabric. You’ll use your thumb and index finger to guide your needle and place your stitches— but when it comes time to really get the needle through the fabric, you’ll mostly do this by pushing with your thimble-covered middle finger.
Personally, I find that most hand quilting issues can be fixed by pairing the right needle to the right thread! If you’re at a loss, just experiment with a few different options from your kit.
Have more questions? Ask below!


1 comment
Great tutorial, thank you!