

Today I'll be showing you how to baste a quilt, on my Simple Stripes quilt. The pattern will be available in my shop on September 16th, 2021.
Great, you’ve made your quilt top!
Now what?
Before you can turn your quilt top into a finished quilt, you’ll need to baste it. Basting a quilt is a way of holding the layers together, before you quilt them by machine or by hand.
There are many ways to baste a quilt, but they tend to fall into three major categories:
-
Thread basting
-
Spray basting
-
Pin basting
Pin basting is, to me, the easiest and most approachable of these techniques. It’s what we’ll be talking about today!
For pin basting, you will layer the components of your quilt, and then hold them together with special bent safety pins.

You will need:
- Quilt top, finished and pressed
- Batting
- Backing
- Safety Pins (These bent safety pins are meant for basting, but any large pins will do!)
Yes, you’ve gotta press your quilt top! This is essential - if you skip it, you risk lots of wrinkles and bumps in your finished quilt.
Your batting and backing should be a few inches larger than your quilt top. Generally, you’ll want them 4” bigger than your quilt on all sides. Sometimes I squeeze by with less, but keep in mind that things may shift slightly while you’re quilting, and cutting it too close with backing or batting is risky.
Okay, now it’s time to form your quilt sandwich!

Lay down your backing fabric on the floor, with the wrong side facing up. Smooth it out as much as possible. You want this part flat, flat, flat!
Then, lay out your batting on top.
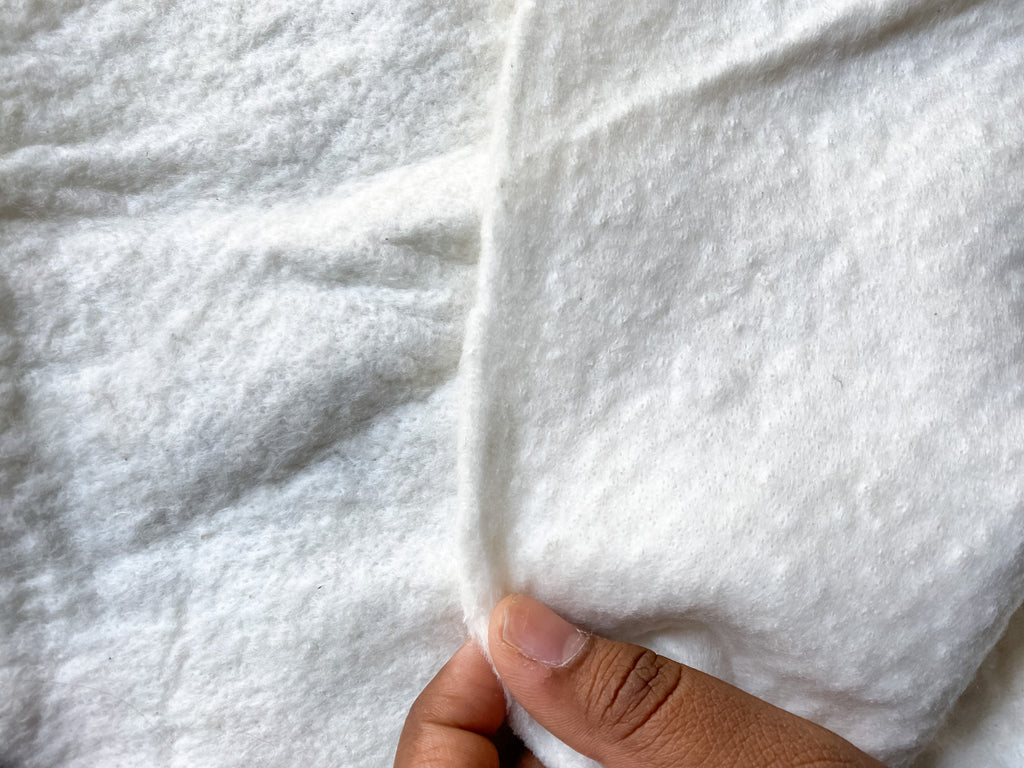
Some batting is even and fluffy on both sides.
Other batting has a fluffy side and a smooth side (with a thin layer of “scrim”). If your batting has scrim, it will have what looks like a super thin sheet of fabric affixed to the top. In the photo above, you can see the fluffy side of the batting on the left, and the smooth side on the right. It's highly debated which side should go up or down, but I like to place the smooth scrim side down, facing the backing of my quilt. The direction shouldn't make a massive difference either way, so it's not a big deal if you can't puzzle this out.

Smooth the batting with your hands, making sure it’s laying on top of the layer of backing with no wrinkles.

Now, lay your quilt top right on top, centering it.
You’ll notice that my quilt top in the photos isn’t perfectly centered - I broke this rule at my own risk! As long as you have a bit of extra backing and batting on all sides, you’ll generally be fine. But centering properly makes things more foolproof, especially for beginners!

Smooth the quilt top with your hands. If you’re working with a really large quilt top, you may need to (carefully!) stand or kneel on the quilt top to access all of it. The key is to work slowly, in small sections, to make sure everything is even and smooth.

Now, we pin baste!

Starting with one corner of the quilt, pin all 3 layers of the quilt together.
I usually begin at one corner of the quilt, and pin every 6-8 inches across.
Then, I’ll pin another row 6-8 inches above or below my first one. And keep going from there.

A totally unofficial technique I’ve come up with, is rolling up the pinned part of the quilt as I go. Once I’ve pinned a couple of rows, I will gently roll my quilt up a bit so I can better access the quilt middle for basting. This is certainly not a traditional technique, and I’m not sure that the Quilt Police would approve— but I do know it works for me.

You’ll end up pinning a grid over your whole quilt. The idea is that many, evenly-spaced safety pins will keep your layers from shifting too much during the quilting process. The more pins, the less shifting. But, keep in mind, the more pins, the more often you’ll have to stop during quilting to remove them!
For beginners, placing pins every 4-6 inches or so is ideal. And it’s much better to have too many pins, rather than too few!
Once you’ve basted your whole quilt, flip it over and check for wrinkles. Fix anything that needs fixing.

And you’re ready to quilt!
Did you enjoy this post? Please consider sharing it with a friend!
|
Affiliate Disclosure If I mention a fabric, product, or notion, I will often provide an affiliate link to the item. If you choose purchase the item through the affiliate link, I will get a small percentage of your purchase to support my work.This will never change the price for you, and I will never recommend anything I wouldn't personally stand behind! My goal is for you to have a great sewing experience, so I am really careful about the quality of products I link to. |