
Reading a Cutting Chart
Most patterns will give you a cutting chart, which tells you exactly how to slice up your fabric. Cutting charts are quick and easy to use once you get used to them. They have a few common conventions, which we’ll review below.
Here’s part of the cutting chart for my Simple Stripes Quilt.

In the leftmost column, you’ll notice I’ve listed the color to be cut - labeled “Background”. Instructions for each quilt size are listed in a new column.
Let’s look at the Baby cutting instructions.
(12) 2 1/2” x WOF strips
This instruction is telling us to cut 12 strips, 2 1/2 inches wide, across the entire width of fabric (WOF). Basically, we are cutting selvedge-to-selvedge, and making a long, skinny strip.
Once we’ve done that, we can move on to the next portion:
(12) 2 1/2” x WOF strips, cut into:
A - (6) 2 1/2” x 20” strips
This is telling us that we are cutting (6) pieces from our previous cut, each 20 inches long.
The “A” refers to the label of this particular cut. When you see letters in your cutting chart, it’s a pretty safe bet that these are cut labels. Once you’ve cut your pieces, I recommend labeling them with a scrap of paper pinned to the stack, or a bit of painter’s tape.
Now that you know how to read a cutting chart, we can move on to the actual cutting!
Getting The Right Tools
You’ll need the following to cut your fabric:
-
A rotary cutter with a fresh blade
Ironing Your Fabric

Yes, you’ll want to iron your fabric. Even if it’s brand new! Every fold and crinkle is a potential crooked cut waiting to happen. I’ve often skipped the ironing step, and have regretted it.
You’ll even want to iron out the big center fold running down the length of your fabric. This fold is often crooked, and it can throw off all your cuts.
Folding Your Fabric
Once you’ve pressed your fabric, you are going to fold it back up lengthwise. This is the most important part when it comes to getting straight, neat cuts! Go slowly here and take your time making sure things are just right.

Line up the selvedges (printed or woven edges) of your fabric neatly, matching them up to each other. The goal here is to keep the fold running perfectly parallel to the fabric selvedges, and perpendicular to our cuts.
If you have a large cutting board and ruler — 24” or longer — you’ll be able to take this once-folded fabric, place it on your cutting mat, and begin slicing away. If you’re working with a smaller cutting mat (like I am) you may need to fold one more time before you can cut.

Once I have a couple feet of my fabric folded once, I fold it again. This time, I want the folded edge of the fabric to come up and meet the selvedges. Again, how neatly and evenly you’re able to line this up will determine how straight your cuts are.
Cutting Your Fabric

Line up your fabric on your cutting mat so that both the selvedge and the bottommost fold match up to lines on your mat.
If your fabric edge is cut unevenly, trim away the excess now to create a straight edge.

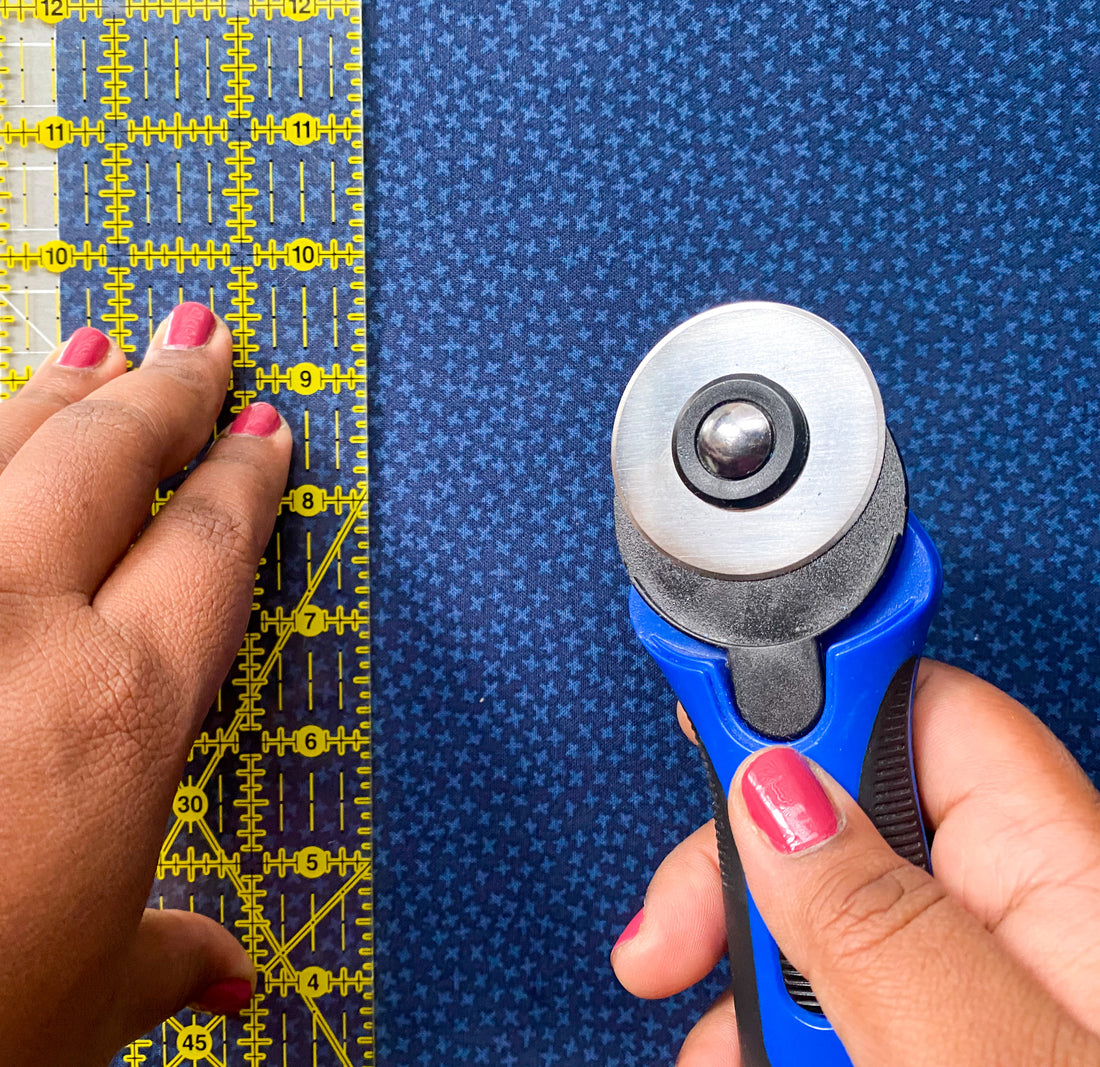
To make your cut, place your ruler on top of your fabric. Use the markings on the ruler to measure the width of your cut. Here, you’ll see that I’m using a 3” wide ruler, and lining it up to my fabric to get a 2 1/2” cut.
Check that the ruler is matched up to the vertical and horizontal lines on the cutting mat. Doing this — lining up the fabric to the cutting mat, and the ruler to the cutting mat— will increase the chances that you’ll get a straight, clean cut.

Holding the ruler firmly with one hand, use your rotary cutter to slice the fabric with your other hand. You’ll want to push the rotary cutter away from your body as you cut.

Now that you’ve sliced your strips, trim off the selvedge. This is the edge of the fabric, which is often raw, printed with the fabric name, or filled with tiny holes from manufacturing. This isn’t usable fabric, so we’ll get rid of it.
Then, take your strips of fabric and make your subcuts.
In our cutting chart example, our initial cut was 2 1/2” x WOF.
Now, we cut the A pieces, which are 2 1/2” x 20” long.

Line up your strip to the lines on your cutting mat.
If your ruler is big enough to create the next cut, great! Line it up to your fabric get the right sized cut, and slice away.
If not, use the markers on the cutting mat to measure your length. Line up your ruler to the right mark on the mat, and cut!
You’ll repeat this process for each cut in your chart. It will go slowly at first, but the more fabric you cut, the faster this whole process will get.
1 comment
Very nice review of preparing fabric for cuts.